Overview
Unit I addresses the use of the Visual Studio development environment; constructing forms using a variety of controls/elements; naming the forms and elements; including multiple forms in a single project; and sharing projects via e-mail. These problems were developed to illustrate common form elements. Note that this unit coincides with one of the competency/mastery demonstrations.
I encourage you to work all the problems to maximize your experience. Consider forming a partnership or group in which everyone shares their work and reflects on differences found. You may also share them with me if you wish and ask questions or seek feedback about particular aspects of particular examples.
Unit I Practice Problem
The goal is to produce two forms in this project—Start, Sample Form. Images and descriptions of the forms are provided below. You are welcome to embellish them if you would like.
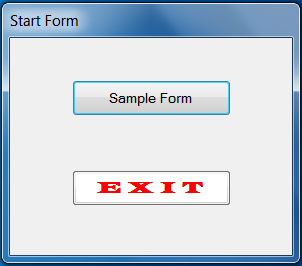
- Start
Forms such as this are used to connect to the other forms via buttons and, perhaps, to transfer some data to them.
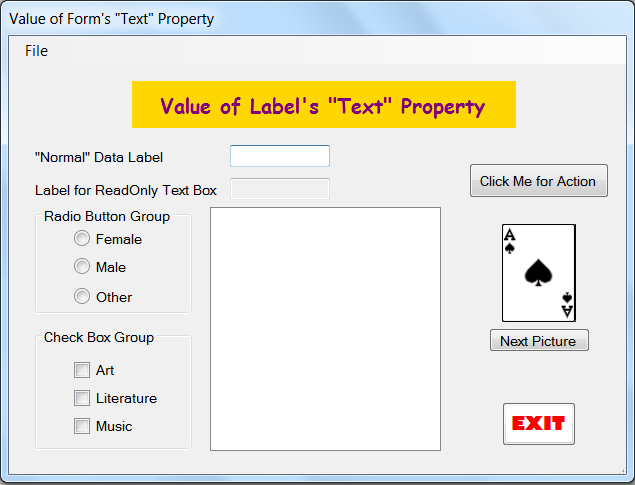
- Sample Form
This form shows most of the form elements/controls that will address in this course. It should provide practice on material seen in class and allow you to learn some new things more independently.
As you work, remember that the purpose is familiarization with forms, form elements, and their properties as well as thinking in terms of problems and problem tasks. Do not worry about getting things exactly, precisely as in the diagrams but do take care to get it close to what is shown and to be neat.
General/common form choices
There are several common practices you should be aware when designing and creating VB forms. You are encouraged to use the naming conventions in the text, i.e., btn plus something for buttons, txt plus something for text boxes, grp plus something for group boxes, rdo plus something for radio buttons, chk plus something for checkboxes, etc. Some controls such as menu strips and labels that never change could just use the default names. You can select several elements/controls and use the Format menu to center them on the page, align them together, etc. Don't worry about (or try to reproduce) which element has the focus (the blue outline around one of the buttons on most of the forms).
Make note of any problems or questions you have as you work on these. We can discuss them in class, during office hours, or via e-mail.
Start Page
Elements used:
    Button
Properties adjusted (on form and buttons):
    Size (form, buttons -- I did it manually)
    Font & Font Size (exit button)
    BackColor & ForeColor (exit button)
    Name (all)
    Text (all)
    Control Box (set to False)
Other:
    Copy & Paste form elements
    select elements; vertical spacing (make even)
    select elements; center on form
    IDE alignment lines
You can imagine that the goal of this form is to provide access to the other "programs" in the collection. One would press a button and starter form for that application would appear. When done with that application, control would return to this form and another program chosen or the user would quit or exit the program.
Note that the form/window does not have the minimize, maximize, and close or exit buttons.
Sample Form
Elements used:
    Label
    MenuStrip
    Button
    TextBox
    GroupBox
    ListBox
    RadioButton
    CheckBox
    PictureBox
Properties adjusted:
    Size (most things -- I did it manually)
    Font & Font Size (exit button)
    BackColor & ForeColor (exit button, label)
    Name (all)
    Text (all)
    ReadOnly (text box, set to True)
    MultiLine (text box, set to True)
    Control Box (of the form, set to False)
    Image (picture box)
    SizeMode (of picture box, set to StretchImage)
This form uses most the of the form elements/controls you are likely to see in this course. Try to explore as much as possible while building this form. Don't worry about making a perfect copy of what I have, but try to come close. Take care with alignment and spacing. As above you will want to name most the of elements to allow better recognition of them when we get to the writing code part of the course.
To use the MenuStrip form element just locate it in the ToolBox and drag one to the form. The name "MenuStrip1" should appear at the bottom of the window and a place to type the Text property value will appear near the top of the form where would expect menus to be. Just type in the value "File" and then under it "Save".
I have prepared a set of card images that you can copy and include in your resources. You can download the "zipped" file from the notes directory. Be aware that you will need to change the name of the file from classic-cards.zipped classic-cards.zip before you can "extract" the folder and files to gain access to the images. The notes file should include some information on that as well as on importing the images into your project resources.
Final Suggestions
To maximize the learning experience with these examples consider how you might change them to make them "better", functionally or aesthetically. And, devise a VB form for some application or problem from your discipline (or that is of personal interest) that you would like to see implemented. If this activity were graded, some results here would be required for an A.
Remember, have fun! Feel free to embellish what you see. The goal is to familiarize yourself with the form objects and their properties (such as font, size, color etc.).
Process Reminders
Don't forget to use Save All. And, use it early and at least after completing each new form.
If you have problems and want me to examine what is going on
- compress/zip the folder—right click on the folder; then select: Send to | Compressed (zipped) folder
- change the name, e.g., change
.zipto.zipped - draft an e-mail message describing your difficulty
- attach the compressed, renamed file to the message
- send me the message
Even if you don't have problems, zip the file as described above and send it to yourself (or a friend) to make sure you know how to zip and unzip the files.