ClipArt A.wmf step by step, concept by concept
- You may do this assignment using either Word or PowerPoint or
Excel. If you do not have PowerPoint at home, Word has the same
Drawing toolbar, as does Excel.
- The
Drawing toolbar is an object-oriented graphics tool.
There are two types of graphics:
- Object-oriented graphics (also called vector or raster
graphics). The computer composes the graphic from
formulas for lines and ovals and rectangles.
- Bitmapped or pixel oriented graphics. We will use
PhotoShop and the Paint Accessory of Windows and
sometime GIMP (from Linux) to learn bitmapped graphics
skills.
- The Insert menu, Picture command, Clipart subcommand takes you
to the Clipart Gallery for Microsoft Office, whether you are
using Word, PowerPoint or Excel.
- The Windows MetaFile we need is named A.wmf. The wmf
extension indicates its graphics type as windows metafile.
A.wmf is located in the Dividers and Decorations category of
clipart. If you cannot Find the file anywhere, use the
Windows Start menu button, Find Files command and search
your hard drive or the network drive for A.wmf to locate it.
- After you have selected the Clipart and Inserted it into your
PowerPoint slide or Word document, you will want to resize it.
- The resize operation can lose the original proportions
of the object. The maintain the original proportions
is also called maintaining the images aspect ratio.
Hold down the Shift key, then drag any corner handle of
the graphic. The object will retain its original
aspect ratio as you resize it smaller or bigger.
- If you wanted to make the object exactly 150% of its
original size, go to the Format menu, Picture command,
Size folder tab. You will see a Lock aspect ratio
checkbox, along with Height and Width boxes.
Type 150 into the Height or spin it up to whatever
value you want. The Width will change to the exact
same percentage.
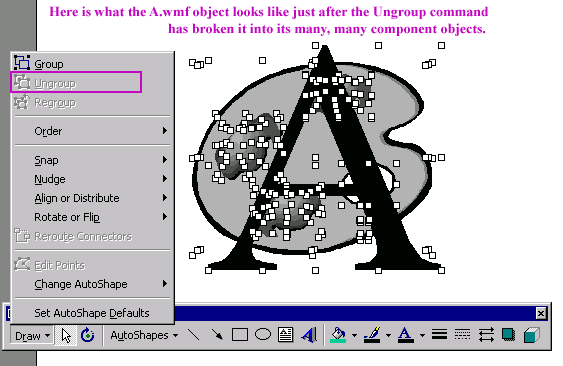
- The Draw toolbar
has as its first button, a Draw button.
This actually shows
an entire menu of choices. To Ungroup
the graphic into its separate component objects, select
the graphic (it will have 8 handles when selected), then
click the Draw toolbar Draw button menu, Ungroup command.
You will receive a warning about losing the original
characteristics of the boring, monotone, one-dimensional
looking Clip "Art". What a loss! Don't worry, the original
one from the Clip Gallery will still always be there
and be as uninteresting as ever, next time you need it.
- Do not be like the Ghostbuster's team, arriving at the
Hotel Sedgwick job
without ever having taken their unlicensed nuclear
accelerators out for a test run.
Here is Try It Out #1,
so please stop reading this and try out some of the techniques
now. When you come back and continue reading, you will
have some ClipArt and Drawing toolbar experience and
a better feel for the tools and concepts.
That is so much better than ending up like
THIS if you wait till
the actual project
faces you before trying out the tools.
- TO BE CONTINUED...
-
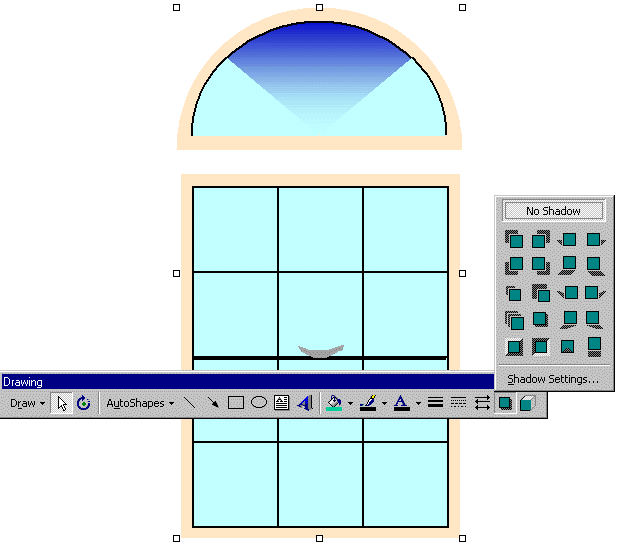
See the floating Drawing toolbar
with the Shadow button, and a before (mostly BEFORE) view of the
original Window Pane clipart.
See the AFTER view of the Window Pane
clipart.