- MOON: Create menu > Polygon Primitives > Sphere to create the moon. Make sure before you do this that the Polygon Primitives menu has Interactive Creation turned off.
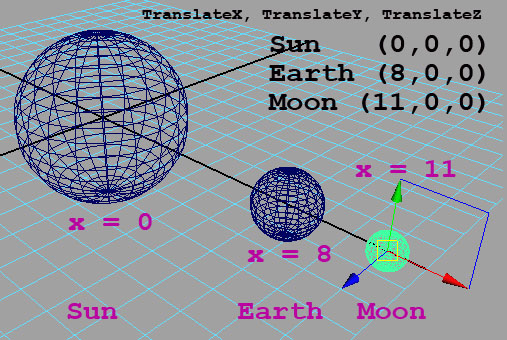
- Using the Red X manipulator to Transform the Sphere over toward the right edge of the grid. You could use the Channel Box to make the TranslateX about 10 or 11 for the attribute value.
- Using the Channel Box, highlight the ScaleX, ScaleY and ScaleZ attribute values. Enter the value 0.5 and press the Enter key (Return on Macintosh) to scale the Sphere smaller.
- In the Channel Box, you will see the name pSphere1. Select that name and rename the sphere by typing Moon for the new name.
- EARTH: Create a 2nd Sphere. Leave it at its original size. ScaleX = ScaleY = ScaleZ = 1.0 will be just fine for the sphere we name Earth.
- TranslateY for the Earth will be exactly 7.0 or 8.0. TranslateY for the Earth sphere must be exactly positioned on a Grid intersection line.
- Name the sphere Earth using the Channel Box to rename the Primitive Polygon sphere object.
- SUN: Now, create the 3rd and final sphere for this exercise. Here Comes the Sun as Richie Havens might sing.
- Name this last Polygonal Sphere Sun. Leave it exactly where it was created by default, as the center of the 3D universe, which is (0, 0, 0), i.e. TranslateX = TranslateY = TranslateZ = 0.0.
- You can either use the Scale tool and the center handle of the manipulator or else you can highlight the 3 values in ScaleX, ScaleY and ScaleZ. Type 3 and press enter and the Sun will be 3 times its original size. Note: The center handle is not Red, Green or Blue. The center Scale handle is a yellow colored cube manipulator. If you manipulate by the center handle the Sphere will be constrained to maintain its original proportions.
- Animate the Sun so it rotates on its axis. How long do you want the animation to be? Type 200 into the end time for the Playback Range, which should be the 3rd box on the Range Slider bar at the bottom of the Maya User Interface. When you press the Enter or Return key, BOTH the end time of the playback range and the end time of the animation will be set to the new value 200. They probably were 24 and 48 before.
- All 3 spheres; Sun, Earth and Moon, will each rotate on their own Y axis. Switch to the Animate menu set by using the menu set chooser pulldown on the very left side of the Status Line or by pressing the F2 function key. Try the F2, F3, F4, F5 and F6 function keys now to see which menu each chooses.
- Select the Sun. Click on RotateY in the Channel Box so RotateY is highlighted. RotateY is the name of the attribute. Be sure the name is highlighted and not the value of the attribute.
- Animate menu > Set Key command will insert a KeyFrame (KF) at Frame #1 on the Time Slider for the Sun object. You will see a vertical red line there on the Time Line afterwards, which indicates the object is keyframed for some attribute value.
- Click the Go To End of Playback Range button which is the last button on the Time Slider bar. The frame you will not be on is frame #200 instead of frame #1.
- Type 720 or 360 into the RotateY value box there in the Channel Box. You are going to rotate the Sun either one full or two full rotations. Then highlight the RotateY attribute name in the Channel Box.
- Animate menu > Set Key to insert a keyframe for the RotateY value.
- Scrub the Time Line by dragging with your left mouse button (LMB) pressed down. If you got all the above steps correct, you will see the Sun rotating around its Y axis. Remember that Maya is Y-up, yup, it is y-up.
- Repeat steps 13 to 18 listed here for the Earth and for the Moon spheres. Scrub the Time Line to ensure that they rotate on their axis too.
- MOON ORBIT: Now, the moon orbits around the earth. How do you achieve that in Maya? We will group the moon to itself, which creates a new object named group1. We will rename that object to be moonOrbit or MoonOrbit.
- Select the Moon sphere. Edit menu > Group command creates a new node named group1 in the Channel Box. Rename that node as moonOrbit.
Notice something about moonOrbit when you select the Move Tool. Where
are the manipulators, the Red and Green and Blue arrows for the Move tool manipulators? They are at (0, 0, 0), the center of the entire 3D universe.
They are in the center of the Sun!
- Use the Insert key to change the Pivot Point for the moonOrbit.
Recall that the Insert key causes the selected object or group to be
placed into Edit Pivot Point mode (or taken out of Edit Pivot Point
mode).
Using the Move tool, move the Pivot Point for the moonOrbit so that it is
at the center of the earth. You will be able to do this perfectly if you
turn on
the Snap To Grid by clicking on the Snap To Grid icon. Since the earth
has been translated to EXACTLY 7 or 8 for TranslateY, we know the center
of the earth is exactly on a gridline.
When you finish moving the pivot point of the moonOrbit group to the
center of the earth, press the Insert key again to exit the Edit Pivot
Point mode.
- The next step is to animate the moonOrbit. Make sure the
timeline is at frame #1. Use the Animate menu > Set key to set a key
for the moonOrbit. Recall that you MUST BE SURE YOU HAVE THE
moonOrbit group selected and NOT the moon! You can use the Outliner
window to do this, or you can choose the Hierarchy mode of selection
(from the H O C icons on the Status Line) so you are selecting
Hierarchy moonOrbit instead of Object moon. Recall H O C is for
Hierarchy mode, Object mode, and Component mode. H O C is the 1st 3
letters of the word HOCKEY. Understanding the HOC concepts is KEY to
using Maya effectively!
After you Animate menu > Set Key for the RotateY attribute of the
moonOrbit for frame #1 on the timeline, move to the end of the animation,
which is frame #200. Type 360 or 720 into the RotateY attribute value for
the moonOrbit here at the end of the animation (frame #200). Animate menu
> Set Key. Scrub the animation to make sure it works okay.
- Now, you are ready to create and then animate the earthOrbit.
Make sure you are in hierarchy mode. Click on the moon, and you will
have selected the moonOrbit group. Hold down the SHIFT key and click
on the earth. Now, both the earth and the moonOrbit are selected.
- Edit menu > Group now creates a group consisting of the earth
and the moonOrbit. Rename this group through the channel box.
Rename it from group1 or group2 name Maya gave it to the name
earthOrbit.
- Make sure the earthOrbit is selected. Move to the beginning
of the entire animation and playback range, i.e. move to frame #1 on
the timeline. Animate menu > Set Key for earthOrbit RotateY
attribute.
- Move the timeline to frame #200, i.e. to the end of the
playback range and animation. Type 360 or 720 as the new value for
the RotateY attribute for earthOrbit group. Then do the Animate menu
> Set Key command.
- Scrub or play the animation and you will now see the earth orbiting
the
sun, while the moon still follows the earth and orbits the earth.
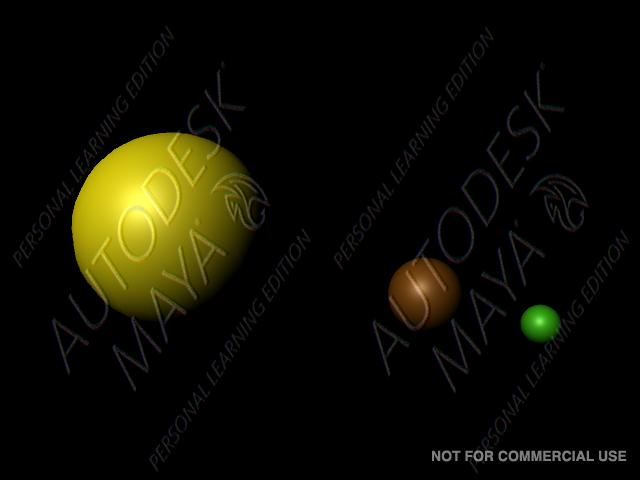
- Change the color of your Polygonal CUBES. Switch back to object
selection mode (The O of H O C icons is Object mode). Select one of the 3
planets (CUBES) and use the
Rendering menu set Lighting/Shading menu > Assign New Material > Blinn as
shown in class. Choose a pretty color for your CUBE planet. Repeat the
process for the other two planets and you are done.
You are now done, and can save your work and send an attachment to
jacobson@cs.uni.edu so I can see that it works okay. You only need to
send you saved Maya scene file.