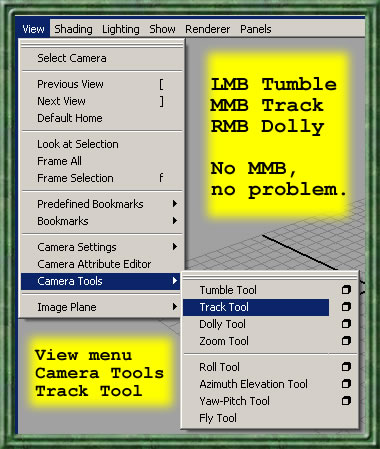
Navigating the scene in Maya. Try using the Camera Tools from time to time and take advantage of the fact that you can quickly get back to it via Y on the QWERTY toolbar, when its still the Y icon for the most recently used tool.
Tumble, Track, Dolly with Alt key plus LMB, MMB or RMB is not always convenient and of course, a MMB is not always available on a mouse or if you have a mouse pad.
Edit menu, Group command with the Moon selected was the technique used to create the moonOrbit.
We can look at the moonOrbit and the Sun, Earth and Moon objects using the command Window menu, Outliner.
You will see the Outliner window in almost every Maya class for the rest of the summer.
- FEMCDW - File Edit Modify Create Display Window are the first six fixed menus.
- Window menu > Outliner command brings up the Outliner.
- Window = W in the FEMCDW or FEMCD W, i.e. 6th menu.
- The 7th menu onward differ depending on which menu set you have chosen: A or P or S or D or R are the fabulous five choices.
- Animation or Polygons or Surfaces or Dynamics or Rendering = APSDR or APS DR.
The entire tutorial is 09:46, but you only need to carefully study the first 03:30 at this early point in the class.
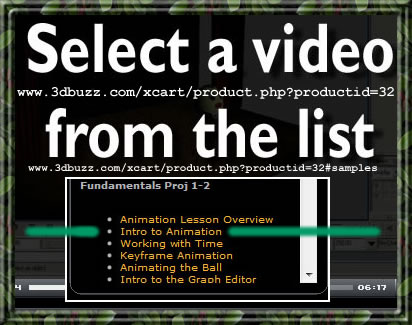
See item #4 from the week one readings and assignment page for orientation to the www.3dbuzz tutorials.

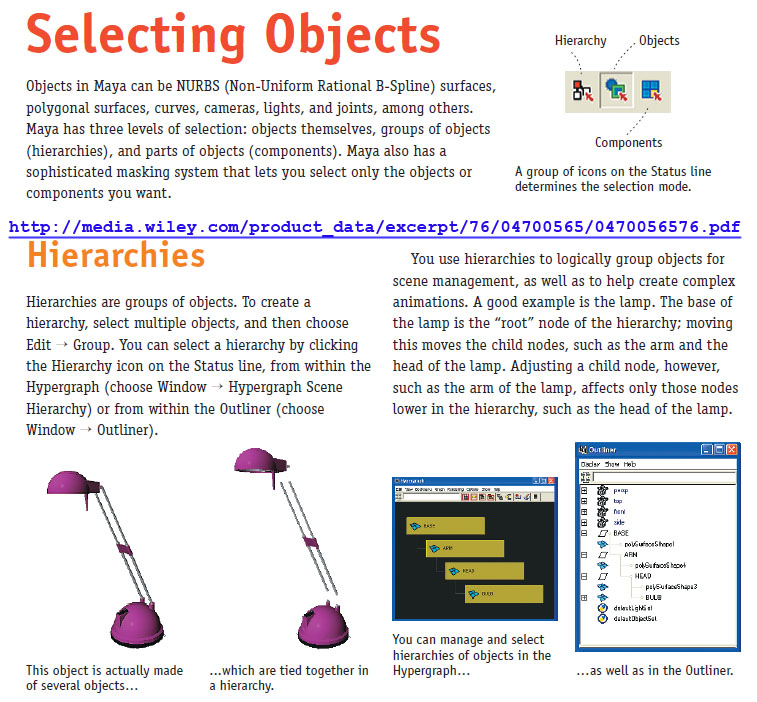
- Nice Wiley book excerpt for introduction to: Selection modes in Maya and the HOC group: You can select an object in Maya, of course. Oh, ya, oh, O. Think O as in Object. But when you click on something in Maya, what you select depends upon the HOC buttons on the Status Line. They are the first 3 icons shown on the Status Line above and I like to call them the HOC group. I suppose you could think of them as the H O C trio.
- H = Select by Hierarchy and Combinations. An object can be part of a larger group. The Moon is part of the MoonOrbit. The MoonOrbit and the Earth will be part of a hierarchy called the EarthOrbit, or will be Combined into and then be one part of a GROUP named EarthOrbit.
(Note: If the selection mode were currently set to Select by Hierarchy and Combinations you would see the word Hierarchy instead of the word Objects on the Status Line above, just to the right of the 3 H O C icons).
- O = Select by Object Type. (Note: you see the word Objects above in the Status Line because currently the selection mode is Objects).
- C = Select by Component Type. Sometimes you want to select pieces or parts of an object. Whether a NURBS Primitive or a Polygonal Primitive object, the objects in Maya that you create from the Create menu > Polygon Primitives commands, etc. are made up of parts.
Examples using Polygon terms VERTEX, EDGE and FACE:
- A point or VERTEX is part of a sphere or cube.
- A line connects two vertex points and is called an EDGE.
- Three or more lines enclose a triangular or rectangular or an n-sided area called a FACE.
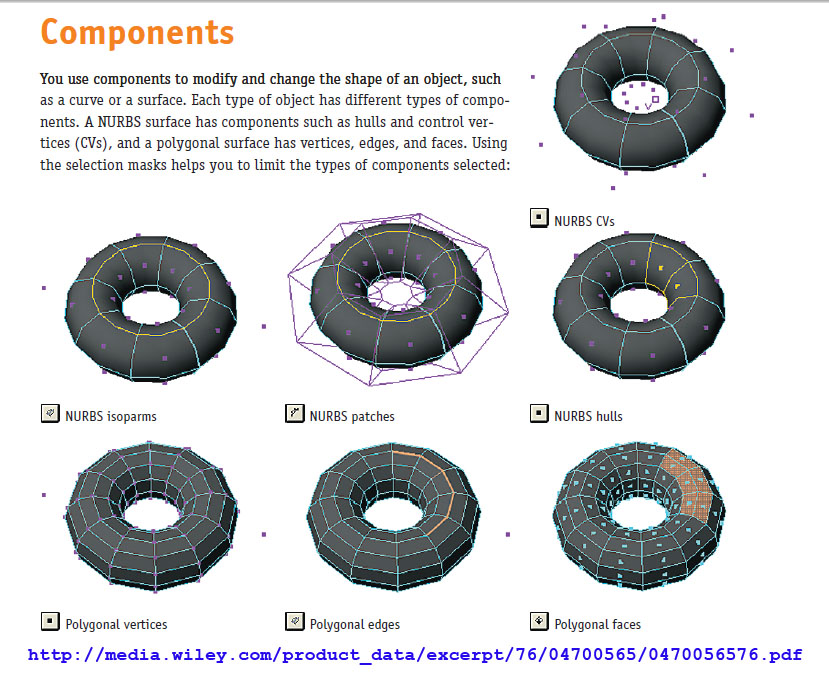
Here's another Wiley book excerpt. See the bottom row of "donuts" to see the Polygonal Faces, Polygonal Edges and Polygonal Vertices.
- We will ignore the NURBS CVs, isoparms, patches and hulls till later in the semester.
- Actually, we will probably NEVER get to NURBS isoparms or patches!
- We will eventually get to NURBs CVs (they are just like the vertex for a polygon, i.e. they are just a point that connects two CURVES instead of two STRAIGHT LINES (polygon edges have to be straight lines).
- CV = control vertex which is another indication a NURBs CV plays exactly the same role as a Polygon Vertex does).
I suppose you could say that the 4th stage was introduced on Friday 01/23, when you were shown how to assign a new material to an object.
You do that using the Rendering menu set's Lighting/Shading menu > Assign New Material > Blinn command.
You can give the object a nice colorful look with a Blinn material color of your choice.
Snap to Grid is on the very right edge of the image. Click the icon and see what happens.
Notice the Magnet is a good intuitive and visual indicator of snapping. Bring a magnet close enough to some paper clips or thumb tacks or iron filings and what happens? The magnetic field takes over and the objects snap to the magnet. Snap to grid means each grid point becomes a powerful magnet.
There are grid points at all combinations where TranslateX, TranslateY and TranslateZ are integers, i.e. whole numbers. (0,0,0) for (x,y,z) location is the most popular GRID point. We had the Sun at (0,0,0), the Earth at (8,0,0) and the Moon at (11,0,0). Thus all of our Primitive Polygonal Spheres were centered on GRID POINTS.
Snap to Grid is on the very right edge of the image. Click the above magnet icon and see what happens.